
Paying in stores or within apps has never been
easier. Get started by adding the credit.......
or debit card on file with your
iTunes to Passbook by entering the card security code.Before you beginYou can start using Apple Pay as soon as you add a credit or debit card to Passbook. Here's what you need:
- iPhone 6 or iPhone 6 Plus (Apple Pay in stores and within apps)
- iPad Air 2 or iPad mini 3 (Apple Pay within apps)
- iOS 8.1 or later in the US or iOS 8.3 or later in the UK
- United States or United Kingdom as your selected region
- Touch ID or passcode on your device
- An Apple ID signed in to iCloud
- Supported card from a participating bank
Set up Apple Pay on your iPhone or iPadAdd a card to your iPhone or iPad:
- On your iPhone 6 or iPhone 6 Plus, open Passbook. On your iPad Air 2 or iPad mini 3, go to Settings > Passbook & Apple Pay.
- Tap Add Credit or Debit Card.
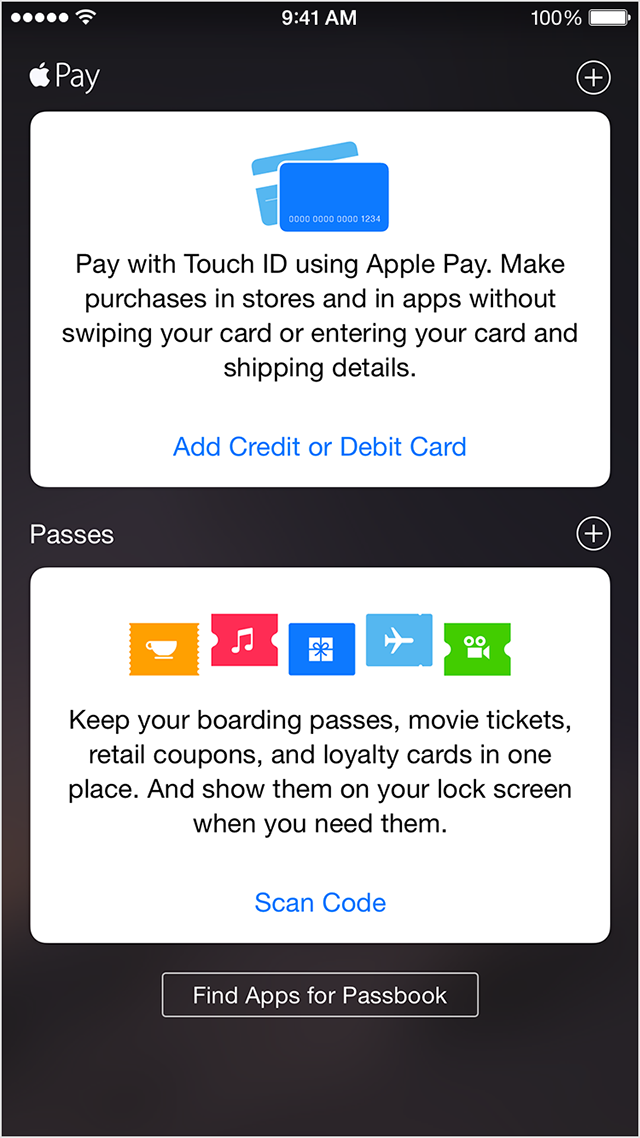
- If you have a supported credit or debit card on file with iTunes, enter the card’s security code. Otherwise, use the camera to capture the information on your credit and debit card. Then fill in any additional information needed, including the card security code.
- Tap Next. Your bank will verify your information and decide if you can add your card to Apple Pay. If they need more information, they'll ask you to provide additional verification. You can verify your card any time after you add it. Just return to Passbook on iPhone or Settings > Passbook & Apple Pay on iPad, and follow the steps.
- After your card is verified, tap Next. Then you can start using Apple Pay.


Some stores might have this symbol on their card readers and POS terminals, but they might not be currently set up to accept contactless payments, including Apple Pay. If you can’t use Apple Pay at a store that's displaying the contactless payment symbol, please let us know using our Apple Pay feedback form.
You can also pay with Apple Pay within participating apps that sell physical goods and services, like groceries, clothing, tickets, reservations, and more. On your iPhone or iPad, you can use Apple Pay to pay within apps when you see the Buy with Apple Pay or Apple Pay button as a payment method. Look for these buttons in apps:


Pay with Apple Pay in storesTo pay with Apple Pay using your default card, hold the top of your iPhone within an inch of the contactless reader with your finger held on Touch ID without pressing it. (You can watch the demo to see how it works.)
If you need to choose between Credit or Debit on the terminal, we recommend that you choose Credit to get the most consistent Apple Pay experience. Choosing Debit might not always work with some older merchant payment terminals and backend systems.
Pay with a different card on your iPhone:
- Hold the top of your iPhone near the contactless reader without placing your finger on Touch ID. Your iPhone will wake up, and you'll see your default card on your screen.
- Tap your default card. From the list of cards, tap the one you want to use.
- Place your finger on Touch ID and move your iPhone near the reader to complete the payment.
- Unlock your iPhone and open the Passbook app.
- Tap the card you want to use.
- Place your finger on Touch ID until you see Hold Near Reader to Pay.
- Hold the top of your iPhone near the contactless reader to send your payment information.
Pay with Apple Pay within appsPay with Apple Pay within an app using iPhone or iPad:
- Tap the Buy with Apple Pay button or Apple Pay button.
- Review your payment information and contact details. Enter other
billing, shipping, and contact information if necessary. Apple Pay will
store that information, so you won't need to enter it again.
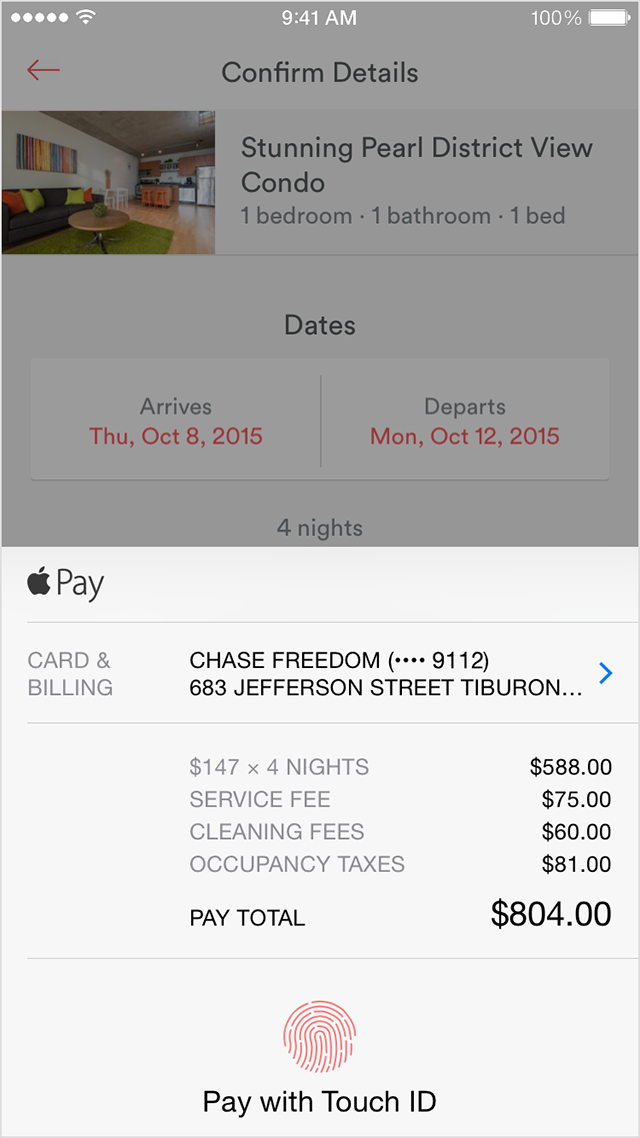
- Place your finger on Touch ID to complete the payment.
Manage your cards on your iPhone or iPadAfter you add credit or debit cards to Passbook, you can change the default card, update your card information, or remove a card at any time. You can have up to eight different cards on any device.
Change your default cardThe first card you add to Passbook is your default card. To change your default card:
- Go to Settings > Passbook & Apple Pay.
- Tap Default Card.
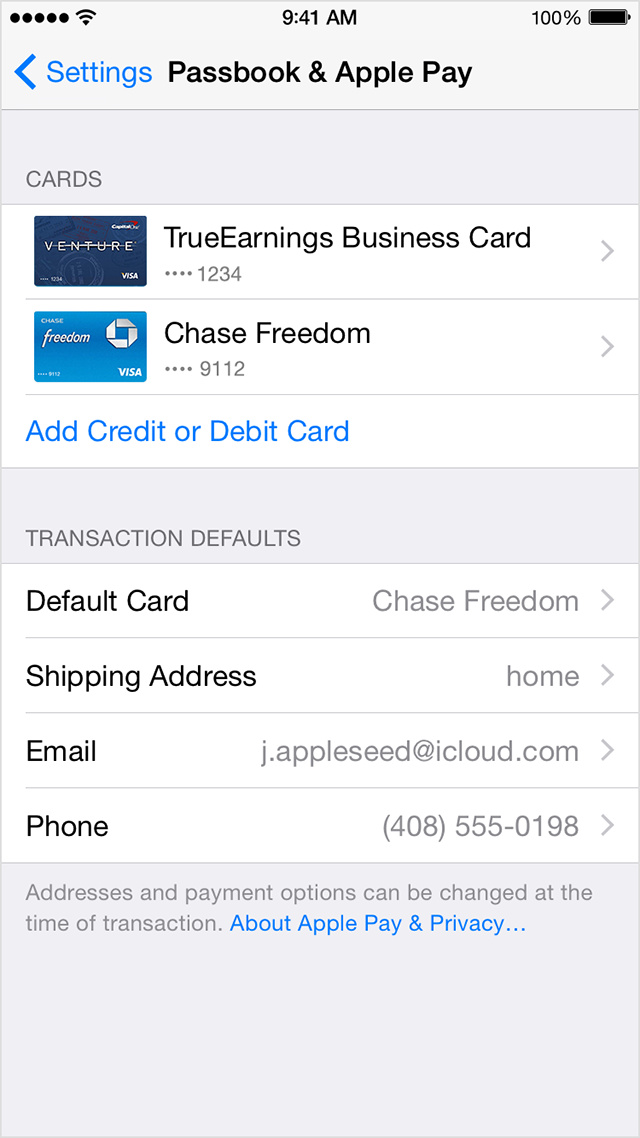
- Choose a new card.
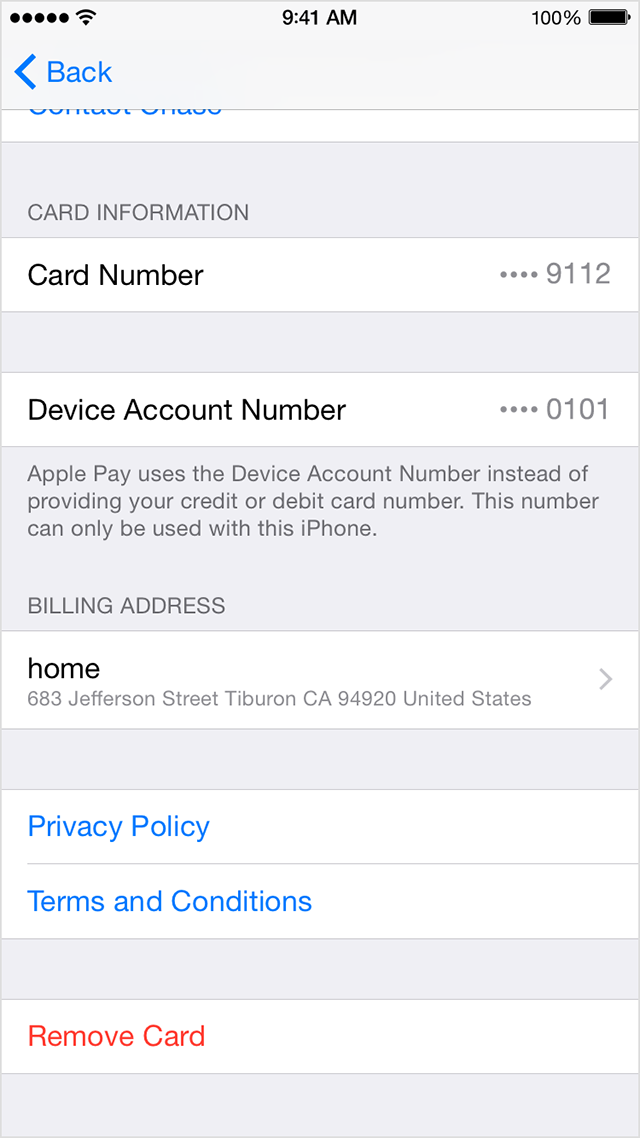
Remove a cardGo to Settings > Passbook & Apple Pay, tap the card that you want to remove, then tap Remove Card.
If Find My iPhone is turned on, you can also help keep your data secure in these ways:
- Turn on Lost Mode to lock your device and suspend Apple Pay.
- Erase your device remotely to prevent anyone else from accessing the data on your missing device and to remove your cards.
Information about products not manufactured by
Apple, or independent websites not controlled or tested by Apple, is
provided without recommendation or endorsement.
Apple assumes no responsibility with regard to the selection, performance, or use of third-party websites or products. Apple makes no representations regarding third-party website accuracy or reliability. Risks are inherent in the use of the Internet. Contact the vendor for additional information. Other company and product names may be trademarks of their respective owners.
Apple assumes no responsibility with regard to the selection, performance, or use of third-party websites or products. Apple makes no representations regarding third-party website accuracy or reliability. Risks are inherent in the use of the Internet. Contact the vendor for additional information. Other company and product names may be trademarks of their respective owners.
Source: support.apple.com